Lexus RX (RX 350L, RX450h) 2016-2025 Repair Manual: Disassembly
DISASSEMBLY
CAUTION / NOTICE / HINT
CAUTION:
Wear protective gloves. Sharp areas on the seat frame may injure your hands.
PROCEDURE
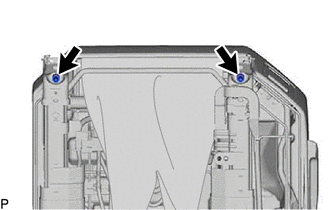
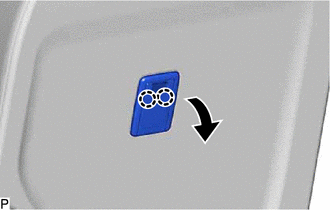
1. REMOVE SEAT ADJUSTER COVER CAP
| (a) Remove the 2 seat adjuster cover caps. |
|
2. REMOVE REAR SEAT COVER CAP LH
(a) Using a screwdriver with its tip wrapped with protective tape, disengage the 2 claws and 2 guides to remove the rear seat cover cap LH as shown in the illustration.
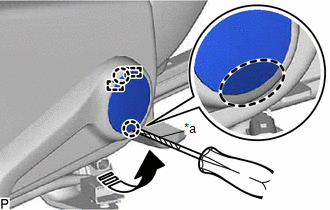
| *a | Protective Tape |
.png) | Insert Screwdriver Here |
.png) | Remove in this Direction |
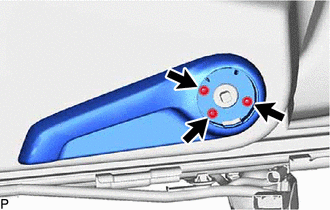
3. REMOVE NO. 1 RECLINING ADJUSTER RELEASE HANDLE LH
| (a) Remove the 3 screws and No. 1 reclining adjuster release handle LH. |
|
4. REMOVE REAR SEAT LOCK CONTROL LEVER SUB-ASSEMBLY LH
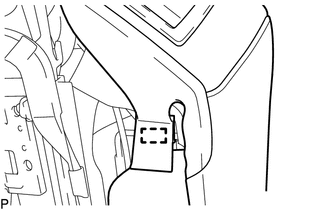
| (a) Disengage the 3 hooks. |
|
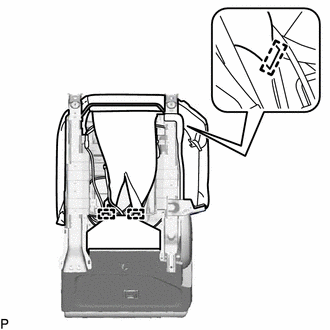
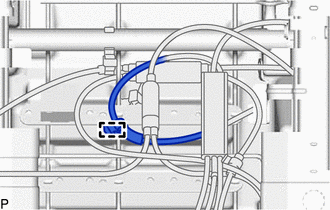
| (b) Disengage the clamp to disconnect the rear seat reclining control cable. |
|
| (c) Disengage the hook. |
|
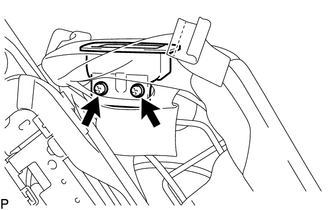
| (d) Remove the 2 screws. |
|
(e) Disengage the guide as shown in the illustration.
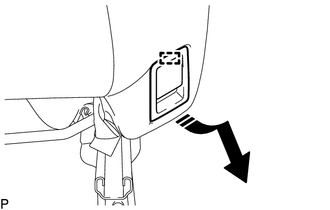
.png) | Remove in this Direction |
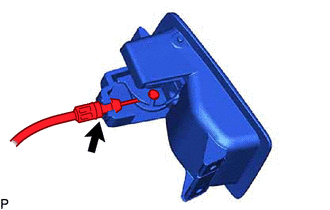
| (f) Disconnect the rear seat reclining control cable to remove the rear seat lock control lever sub-assembly LH. |
|
5. REMOVE SEPARATE TYPE REAR SEAT CUSHION COVER WITH PAD
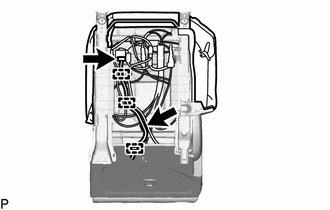
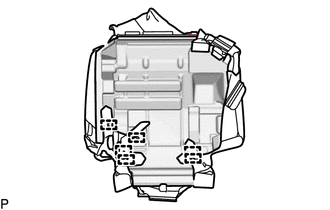
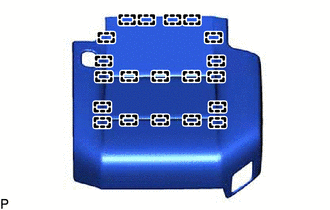
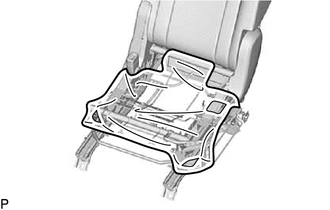
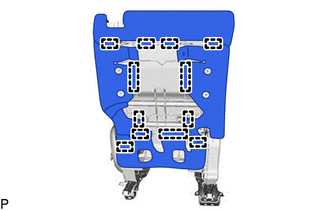
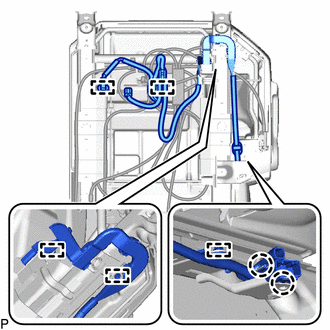
| (a) Disengage the 4 hooks. |
|
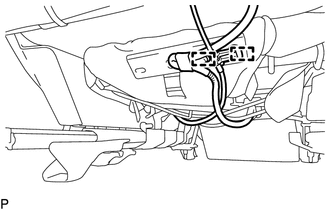
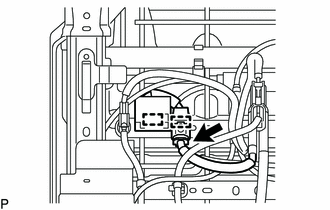
(b) w/ Seat Heater System:
| (1) Disconnect the 2 connectors. |
|
(2) Disengage the 3 clamps.
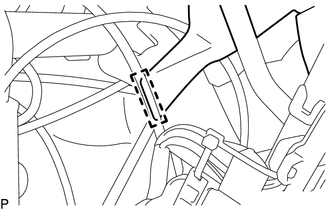
| (c) Disengage the 2 clamps. |
|
| (d) Disengage the hook. |
|
(e) Disengage the 9 hooks and remove the separate type rear seat cushion cover with pad.
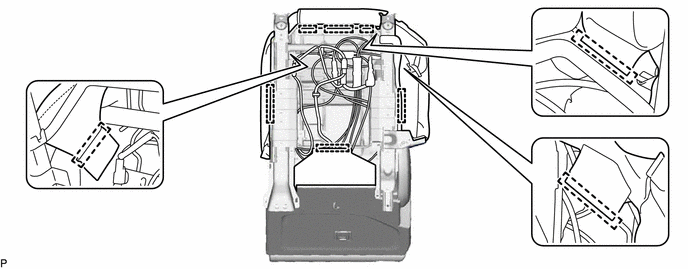
6. REMOVE SEPARATE TYPE REAR SEAT CUSHION COVER
(a) Disengage the fastener.
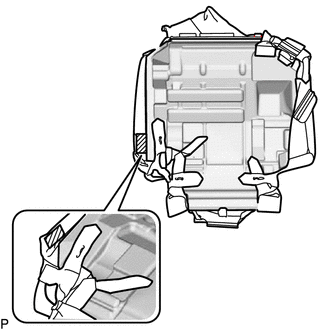
.png) | Fastener |
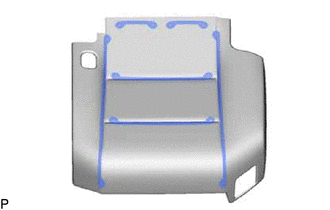
| (b) Remove the 6 hog rings. |
|
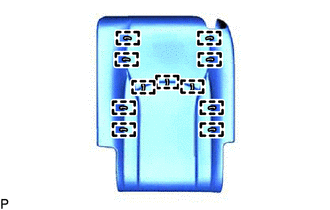
| (c) Remove the 20 hog rings and separate type rear seat cushion cover from the rear seat cushion pad LH. |
|
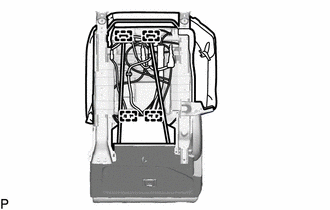
7. REMOVE SEAT COVER WIRE
| (a) Remove the 6 seat cover wires. |
|
8. REMOVE SEAT HEATER ASSEMBLY (w/ Seat Heater System)
Click here .gif)
.gif)
9. REMOVE REAR SEAT CUSHION EDGE PROTECTOR
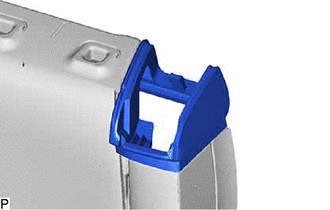
| (a) Remove the rear seat cushion edge protector. |
|
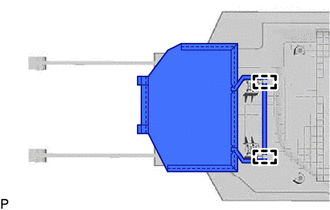
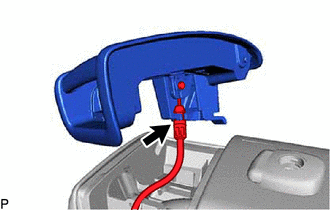
10. REMOVE SEAT HEATER CONTROL SUB-ASSEMBLY LH (w/ Seat Heater System)
| (a) Disconnect the connector. |
|
(b) Disengage the 2 clamps to remove the seat heater control sub-assembly LH.
11. REMOVE REAR NO. 1 SEAT RECLINING ADJUSTER INSIDE COVER
(a) Disengage the clip and 3 claws to remove the rear No. 1 seat reclining adjuster inside cover as shown in the illustration.
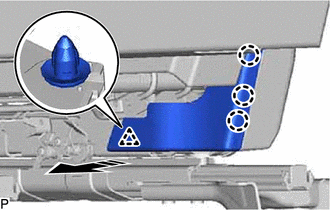
.png) | Remove in this Direction |
12. REMOVE REAR SEAT INNER BELT ASSEMBLY LH
Click here .gif)
.gif)
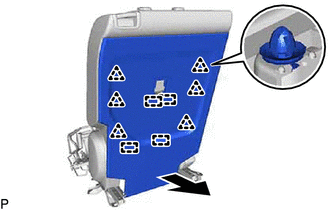
13. REMOVE REAR SEATBACK COVER LH
| (a) Disengage the 2 claws as shown in the illustration. |
|
(b) Disengage the 6 claws and remove the rear seatback cover LH as shown in the illustration.
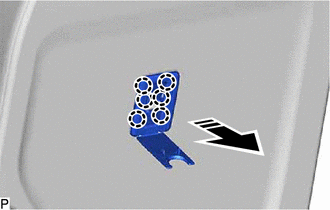
.png) | Remove in this Direction |
14. REMOVE REAR SEATBACK BOARD CARPET ASSEMBLY LH
| (a) Disengage the 6 clips and 4 guides as shown in the illustration. |
|
(b) Disengage the 3 guides to remove the rear seatback board carpet assembly LH as shown in the illustration.
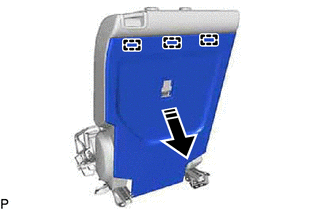
.png) | Remove in this Direction |
15. REMOVE NO. 2 SEAT CUSHION COVER SUB-ASSEMBLY LH
| (a) Disengage the 2 guides to disconnect the rubber band and remove the No. 2 seat cushion cover sub-assembly LH. |
|
16. REMOVE REAR SEAT UPPER RECLINING COVER LH
(a) Disengage the claw and 2 guides to remove the rear seat upper reclining cover LH as shown in the illustration.
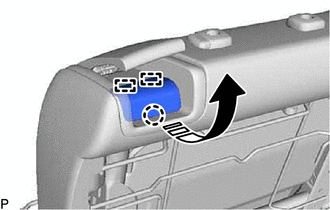
.png) | Remove in this Direction |
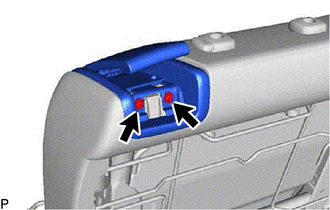
17. REMOVE RECLINING REMOTE CONTROL LEVER SUB-ASSEMBLY LH
| (a) Remove the 2 screws. |
|
(b) Disengage the guide as shown in the illustration.
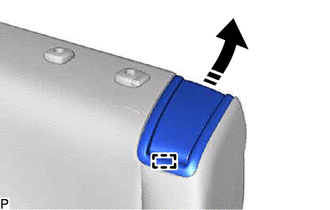
.png) | Remove in this Direction |
| (c) Disconnect the reclining adjusting cable assembly to remove the reclining remote control lever sub-assembly LH. |
|
18. REMOVE SEPARATE TYPE REAR SEATBACK COVER WITH PAD
| (a) Disengage the 12 hooks. |
|
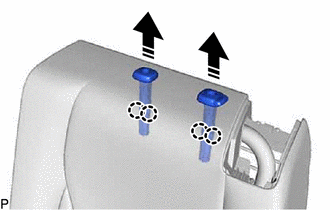
(b) Disengage the 4 claws and remove the 2 rear No. 1 seat headrest support assemblies as shown in the illustration.
.png) | Remove in this Direction |
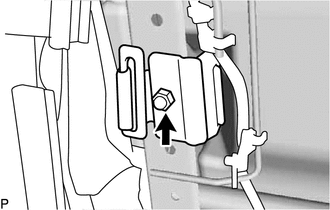
| (c) Remove the nut and disconnect the 2 rear seatback cover brackets. |
|
(d) Remove the separate type rear seatback cover with pad.
19. REMOVE SEPARATE TYPE REAR SEATBACK COVER
(a) Disengage the 2 fasteners.
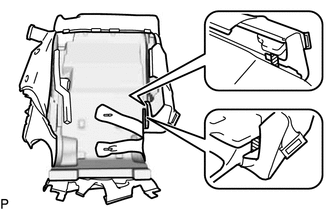
.png) | Fastener |
| (b) Remove the 2 hog rings. |
|
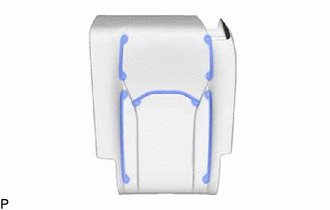
| (c) Remove the 11 hog rings and separate type rear seatback cover from the separate type rear seatback pad. |
|
20. REMOVE RECLINING REMOTE CONTROL BEZEL LH
| (a) Remove the reclining remote control bezel LH. |
|
21. REMOVE SEAT COVER WIRE
| (a) Remove the 5 seat cover wires. |
|
22. INSTALL SEAT HEATER ASSEMBLY (w/ Seat Heater System)
Click here .gif)
.gif)
23. REMOVE REAR SEAT AIRBAG ASSEMBLY LH
Click here .gif)
.gif)
24. REMOVE REAR SEATBACK EDGE PROTECTOR
| (a) Remove the rear seatback edge protector. |
|
25. REMOVE NO. 1 RECLINING LINK COVER LH
(a) Disengage the 5 claws and guide to remove the No. 1 reclining link cover LH as shown in the illustration.
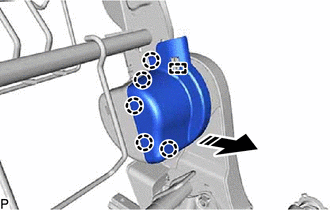
.png) | Remove in this Direction |
26. REMOVE NO. 2 RECLINING LINK COVER LH
(a) Disengage the guide to remove the No. 2 reclining link cover LH as shown in the illustration.
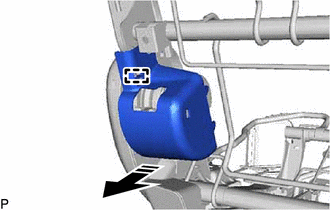
.png) | Remove in this Direction |
27. REMOVE REAR NO. 1 SEAT RECLINING COVER LH
(a) Disengage the 10 claws and 6 guides as indicated by the arrows, in the order shown in the illustration to remove the rear No. 1 seat reclining cover LH.
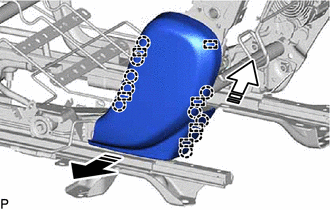
.png) | Remove in this Direction (1) |
.png) | Remove in this Direction (2) |
28. REMOVE REAR NO. 1 SEAT RECLINING ADJUSTER INSIDE COVER
(a) Disengage the 2 claws and guide as indicated by the arrows, in the order shown in the illustration to remove the rear No. 1 seat reclining adjuster inside cover.
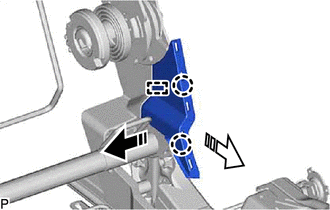
.png) | Remove in this Direction (1) |
.png) | Remove in this Direction (2) |
29. REMOVE REAR NO. 1 SEAT RECLINING ADJUSTER INSIDE COVER
(a) Disengage the 2 claws, clip and guide to remove the rear No. 1 seat reclining adjuster inside cover as shown in the illustration.
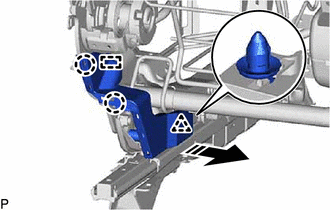
.png) | Remove in this Direction |
30. REMOVE REAR NO. 1 SEAT RECLINING ADJUSTER INSIDE COVER
(a) Disengage the 6 claws and 2 guides as indicated by the arrows, in the order shown in the illustration to remove the rear No. 1 seat reclining adjuster inside cover.
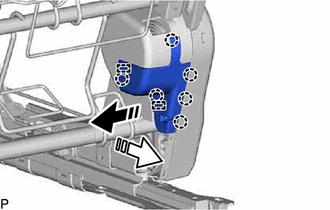
.png) | Remove in this Direction (1) |
.png) | Remove in this Direction (2) |
31. REMOVE REAR NO. 1 SEAT RECLINING ADJUSTER INSIDE COVER
(a) Disengage the 2 claws and guide as indicated by the arrows, in the order shown in the illustration to remove the rear No. 1 seat reclining adjuster inside cover.
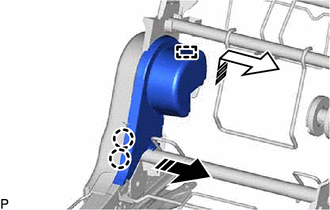
.png) | Remove in this Direction (1) |
.png) | Remove in this Direction (2) |
32. REMOVE REAR SEAT INNER RECLINING COVER LH
(a) Disengage the clip, claw and 2 guides as indicated by the arrows, in the order shown in the illustration to remove the rear seat inner reclining cover LH.
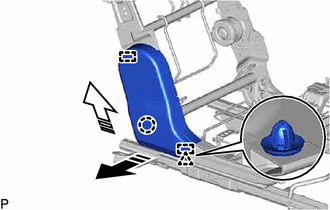
.png) | Remove in this Direction (1) |
.png) | Remove in this Direction (2) |
33. REMOVE REAR SEAT RECLINING SEAT COVER LH
(a) Disengage the 5 claws and guide to remove the rear seat reclining seat cover LH as shown in the illustration.
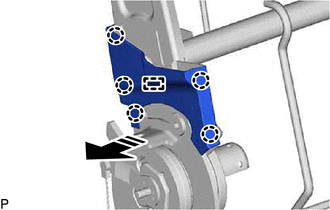
.png) | Remove in this Direction |
34. REMOVE REAR SEAT RECLINING SEAT COVER LH
(a) Disengage the guide and remove the rear seat reclining seat cover LH as shown in the illustration.
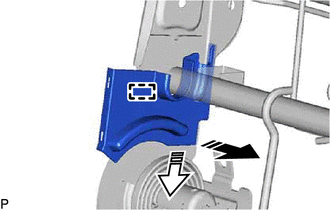
.png) | Remove in this Direction (1) |
.png) | Remove in this Direction (2) |
35. REMOVE REAR SEAT WIRE LH
| (a) Disengage the 2 claws and 5 clamps, and remove the rear seat wire LH. |
|
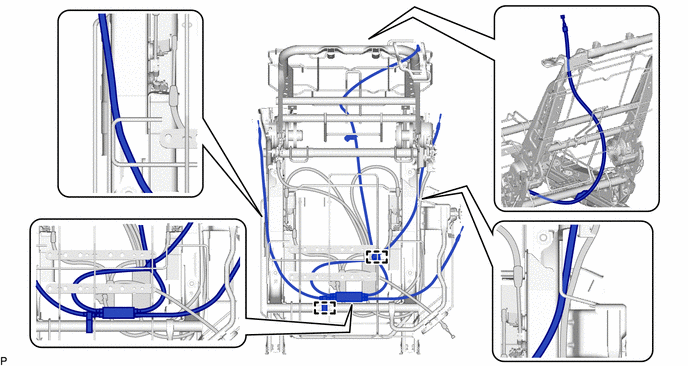
36. REMOVE RECLINING ADJUSTING CABLE ASSEMBLY
(a) Disengage the 6 clamps.
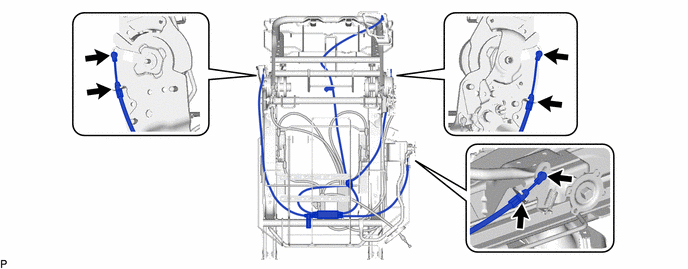
(b) Disengage the 2 clamps and remove the reclining adjusting cable assembly.
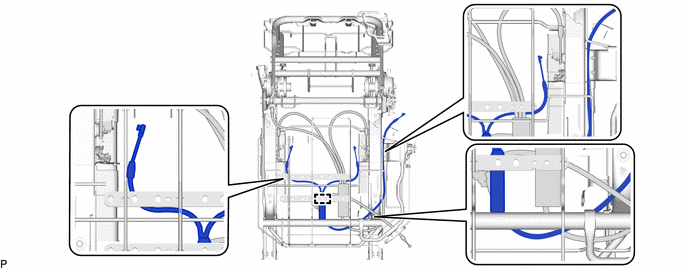
37. REMOVE REAR NO. 1 SEAT TRACK CONTROL CABLE ASSEMBLY LH
(a) Disengage the 6 clamps.
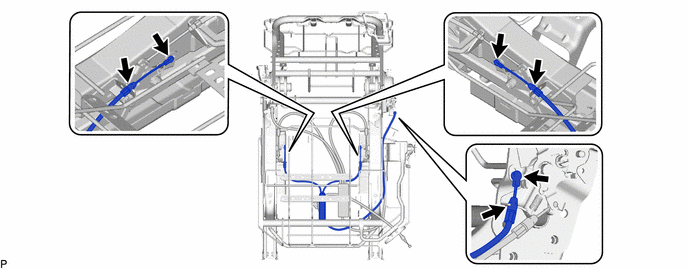
(b) Disengage the clamp and remove the rear No. 1 seat track control cable assembly LH.
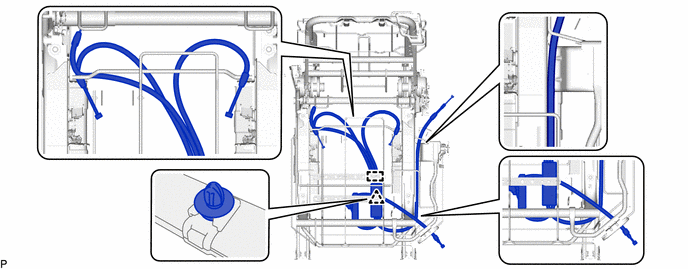
38. REMOVE REAR SEAT RECLINING CONTROL CABLE
(a) Disengage the 8 clamps.
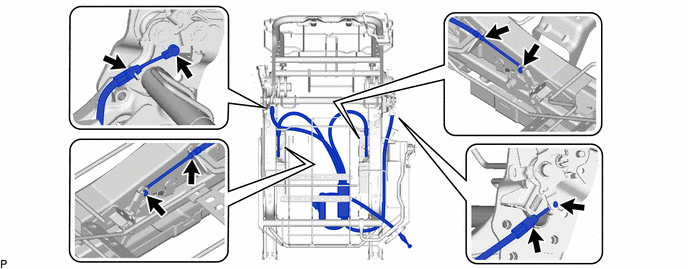
(b) Disengage the clip and clamp, and remove the rear seat reclining control cable.
39. REMOVE RECLINING CONTROL LINK SUB-ASSEMBLY LH
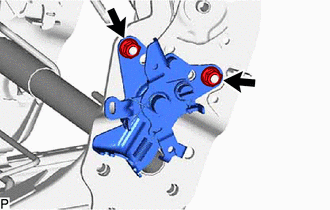
| (a) Remove the 2 nuts and reclining control link sub-assembly LH. |
|
40. REMOVE RECLINING CONTROL LINK SUB-ASSEMBLY LH
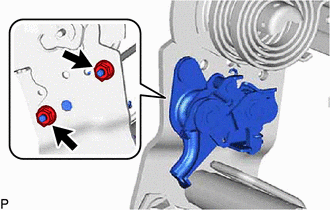
| (a) Remove the 2 nuts and reclining control link sub-assembly LH. |
|
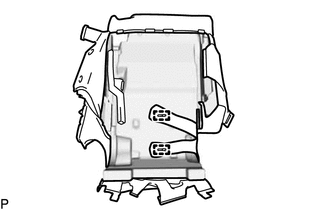
41. REMOVE REAR SEATBACK FRAME SUB-ASSEMBLY LH
(a) Using a T40 "TORX" socket wrench, remove the 6 bolts.
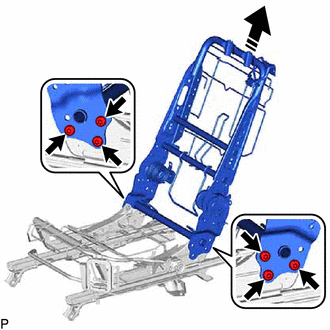
.png) | Remove in this Direction |
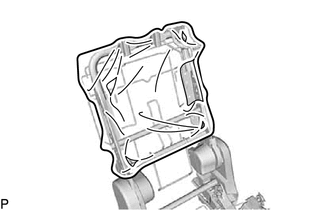
(b) Remove the rear seatback frame sub-assembly LH from the No. 1 seat cushion frame sub-assembly LH as shown in the illustration.
 Removal
REMOVAL CAUTION / NOTICE / HINT The necessary procedures (adjustment, calibration, initialization or registration) that must be performed after parts are removed and installed, or replaced during rear ...
 Installation
INSTALLATION CAUTION / NOTICE / HINT CAUTION: Wear protective gloves. Sharp areas on the seat frame may injure your hands. PROCEDURE 1. INSTALL REAR NO. 1 SEAT ASSEMBLY LH (a) Place the rear No. 1 sea ...
Other materials:
Lexus RX (RX 350L, RX450h) 2016-2025 Repair Manual > Air Conditioning System: Check Mode Procedure
CHECK MODE PROCEDURE REFRIGERANT SHORTAGE CHECK IN NORMAL OPERATION (CHECK A/C SWITCH INDICATOR AND DTC) (a) Start the engine. (b) Check that the A/C switch indicator remains on when the following conditions are met. *a A/C Switch (Multi-display) Measurement Condition: Item Condition ...
Lexus RX (RX 350L, RX450h) 2016-2025 Repair Manual > Dynamic Radar Cruise Control System: Internal Control Module Software Incompatibility Not Programmed (U030051)
DESCRIPTION If the forward recognition camera cannot verify the vehicle information sent from the ECM, the forward recognition camera stores DTC U030051. DTC No. Detection Item DTC Detection Condition Trouble Area MIL DTC Output from U030051 Internal Control Module Software Incomp ...
Lexus RX (RX 350L, RX450h) 2016-{YEAR} Owners Manual
- For your information
- Pictorial index
- For safety and security
- Instrument cluster
- Operation of each component
- Driving
- Lexus Display Audio system
- Interior features
- Maintenance and care
- When trouble arises
- Vehicle specifications
- For owners
Lexus RX (RX 350L, RX450h) 2016-{YEAR} Repair Manual
0.0146

